
When I think back, most of my favorite crafts were learned in grade school. Using crayons over watercolor, making art from paper towels, and nap time. Those are some of my fave elementary memories. One of the best skills I learned (and I still use it to this day!), is pricking paper with a pin and creating stationery. So fun. And so easy!
Pinhole stationary has to be one of the best ways to dress up some regular old paper. The font choices are endless, and you can make it as big or as small as you want! Read below for the refresher!

To make your own you’ll need:
- cardstock in assorted colors
- scissors
- tape
- safety pin
- mirrored image or text

To mirror your text, copy from Word and paste into Paint. Right-click “Image” and select “Rotate or Flip” and flip yo’ message horizontally. Easy as pie, I tell you. Tape the words to the inside of your card and start pricking with a pin. Outline the text with the pin. Don’t poke holes all over the place. It’s not as pretty looking. Trust me.

Watch some TV while you poke all of the little holes. I did this while watching The Graduate. I don’t know why I thought I would like that movie. I clearly didn’t remember how strange it was. Finish pricking/poking, remove the tape and paper, and…

Bada-bing.


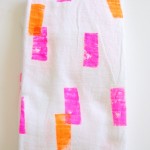
Play around with a few fonts and see what you like! They look pretty cool when held up to the light.

Write a message on the inside. Send to a friend. And then go finish watching the olympics. The gymnastics just kills me.
Who are you rooting for in 2012? What’s your favorite event?


This is AWESOME!!! I loved doing that growing up. Reminds me of like a starbright thing or something 🙂
K, I used to have a starbright and I LOVED it! Where can I find one? My kids will need their own…
They were called light brights. If your state has a goodwill/savers or other thrif store you can find them there still! 🙂
Thank you, Brittany! I was racking my brain trying to think of what they were called. My grandparents used to have one and I LOVED it! 🙂
Lexy you never cease to amaze me with your awesomeness!
haha, Kinz! You’re the best. I’m not awesome, I just have a great memory from my elementary days! 🙂
you’re a magician!!!!
You’re the magician, Jane. Please come to Denver.
I love this idea! So simple, yet so stylish and fresh! The possibilities are endless!
Thanks, Kara! It’s nice to be able to add a modern twist to classic crafts!
OMG, This is such a great idea!!! Wish I had thought of this last month!! It’s such a simple and inexpensive project, yet very ellegent at the same time!! …And yes, it deffinitely takes me way back!! CUTE CUTE!! Think I may try this soon!! Thanks for the idea!!
Thanks, Lori! You should make a bunch this weekend and just file them away so you have them on hand for next time! 🙂
So inspiring – something to keep the kids busy doing this Summer. Thanks for sharing.
Hi Geraldine! The kids definitely love these kinds of projects. 🙂
Sometimes I don’t add string to the sewing machine so I can make the pinholes faster as I run the card under the needle:)
A sewing machine would make things SO much easier! I would have tried that, but there were so many little curves it wasn’t working for me!
Hi Lexy! Found your blog through http://www.parscaeli.com and these pinhole cards are awesome!! I love craft projects that are super easy peasy!! Lookin fwd to following your pretty blog! =)
Hi Louise! Thanks for visiting! I’m with you – I prefer the easy craft projects! Hope you’ll stick around! 🙂
I absolutely LOVE this! I try to make handmade cards whenever an occasion arises — it’s just so much more personal and there’s something so quaint about handmade cards. I’ll have to try this next time! Very simple yet very impactful
I’m the same way! I prefer anything handmade. 🙂 These cards are so easy to make it’s ridiculous! And you can do it with any design!
Clever and creative! I like this idea
Lovin’ it! And SO easy!!