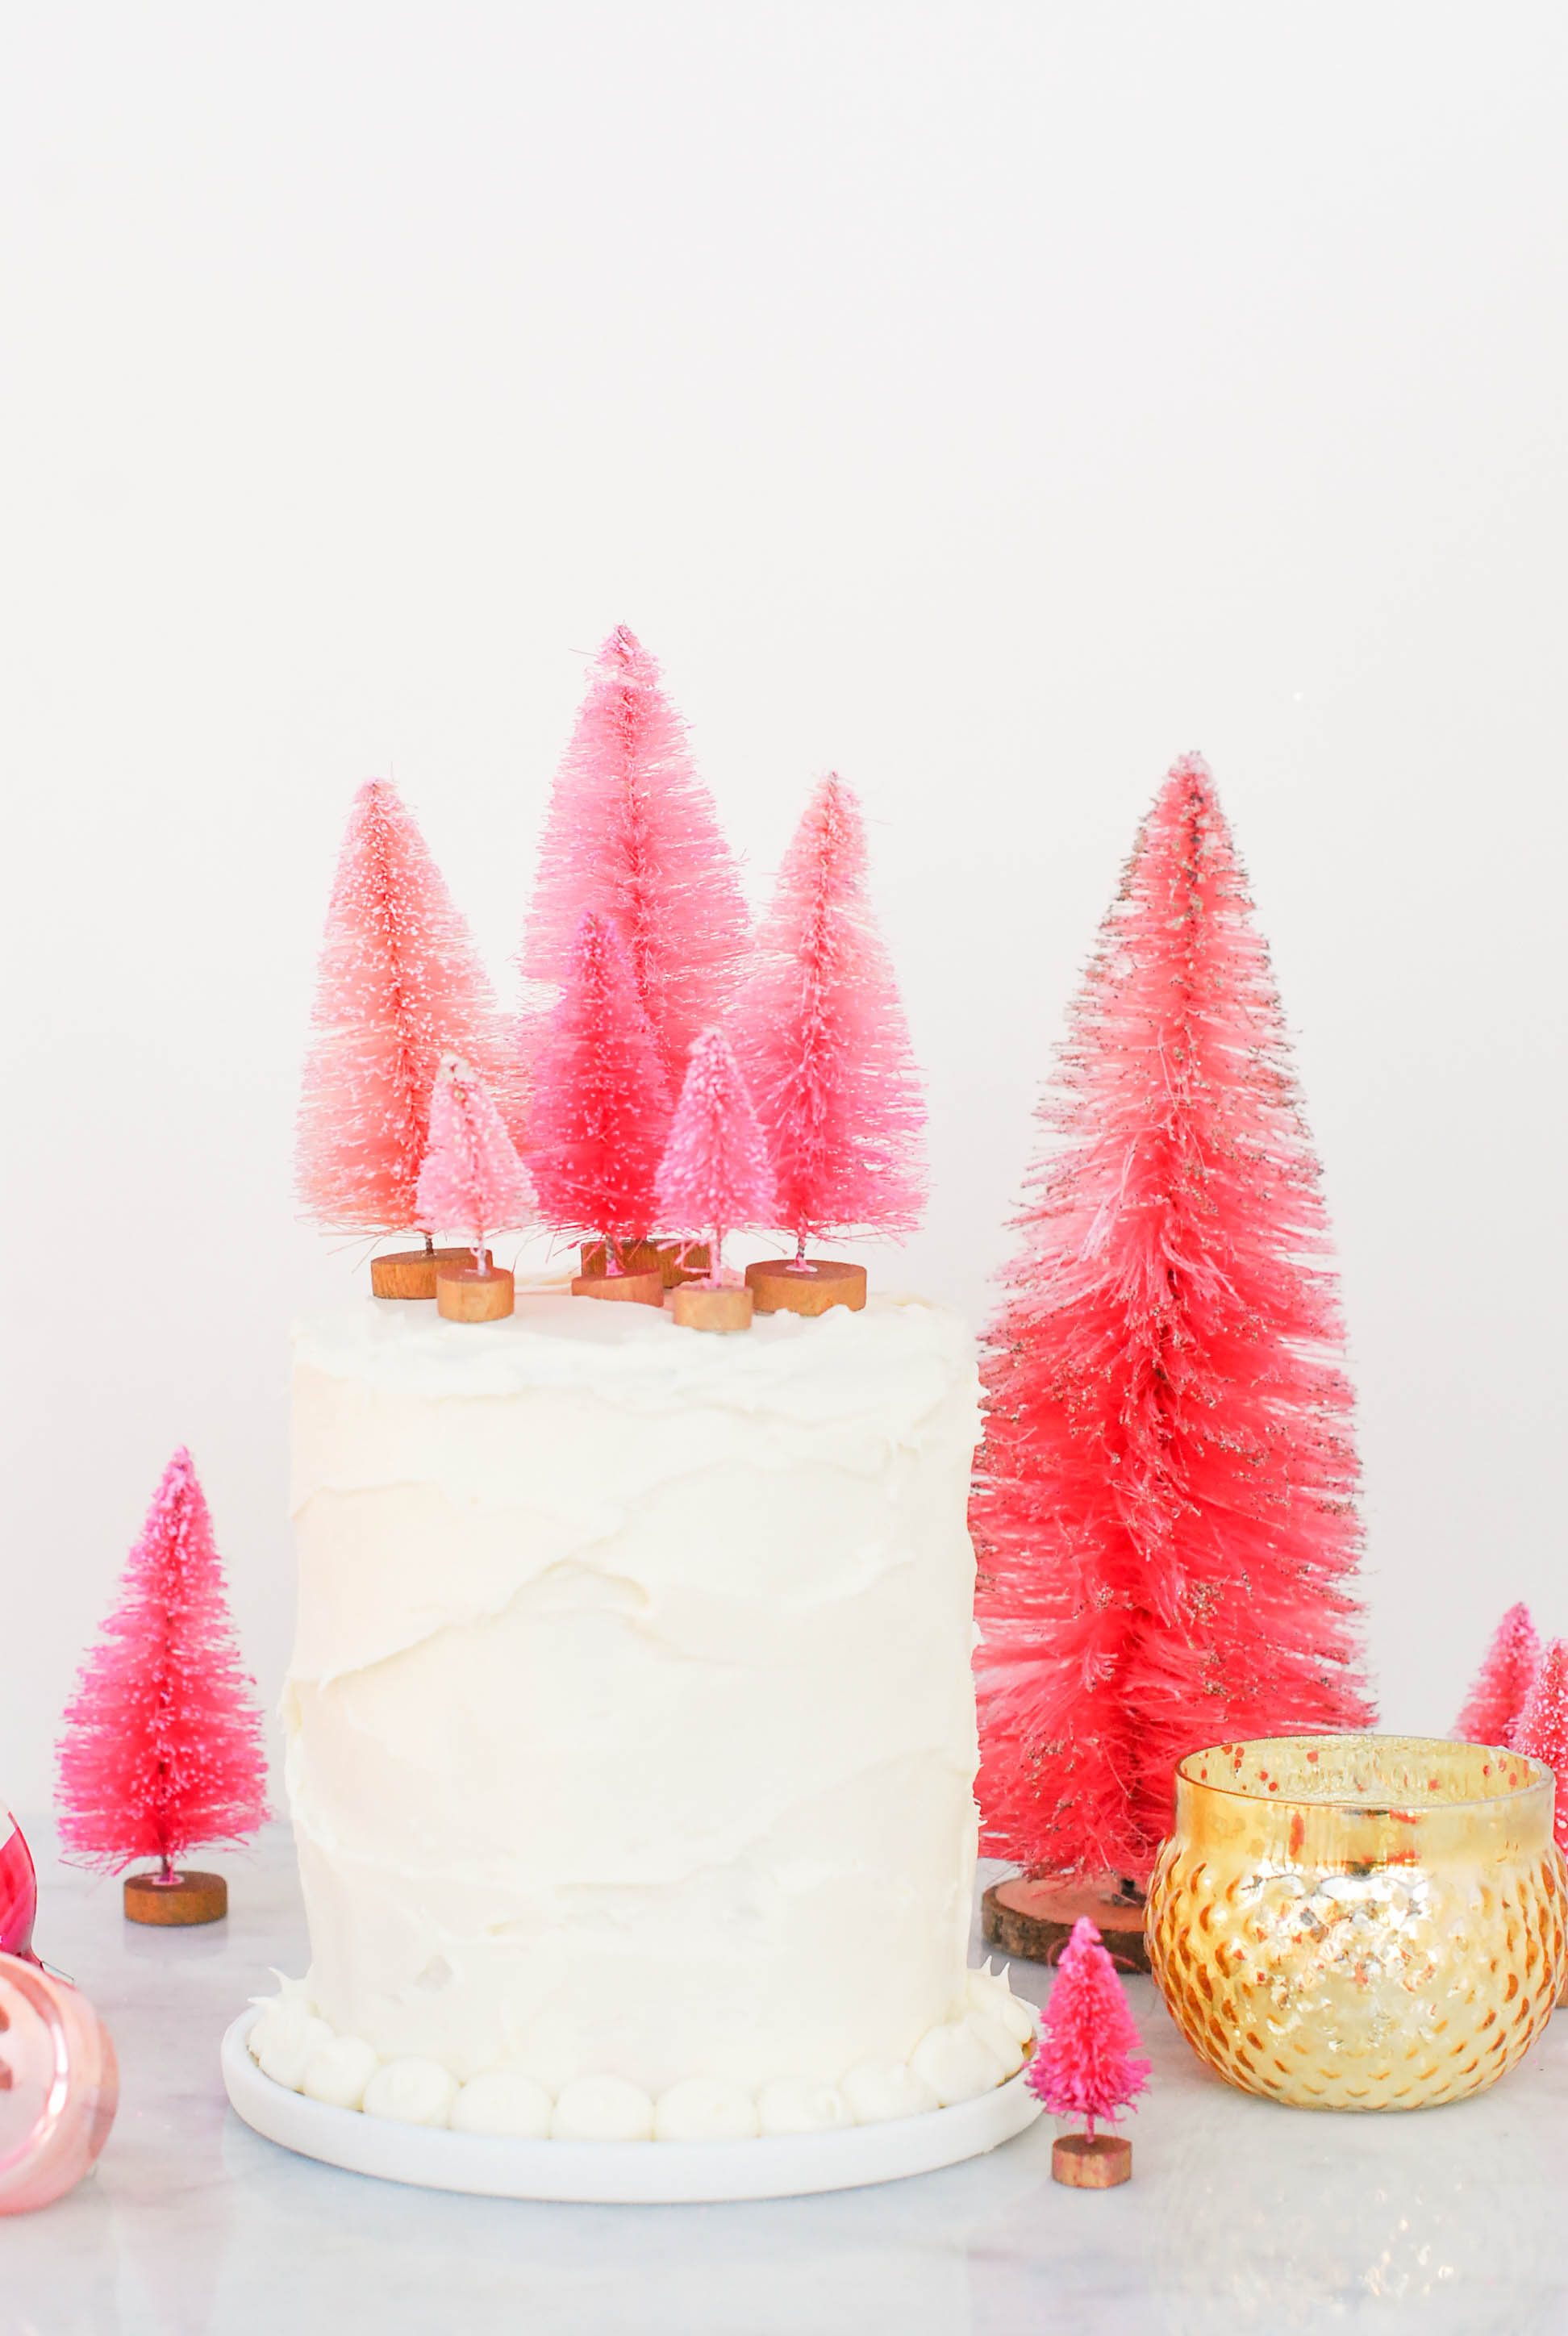
You’ve seen them every holiday season. I started collecting bottlebrush trees a few years ago. And then I realized I was always searching for a specific color that I could never find. So now we make our own! And let me tell you, it’s addicting. You can find an assortment of bottlebrush trees all over our house. And lately, you can find them on top of cakes! I had been wanting to do this since the typography cake toppers a few months ago, but felt that a forest of trees a top a cake in the spring just didn’t really fit. But we are in full-fledged winter now, baby! So let’s talk about how to make your own bottlebrush tree cake toppers, mmmmkay?


To make your own bottlebrush tree cake toppers you’ll need:
- large bucket filled with bleach (add just a fraction of water, but keep it mostly bleach so you can do this fast!
- bottlebrush trees in different sizes (find them at your local craft store)
- tongs
- RIT dye (pink ftw)

Toss your trees into the bucket of bleach. Their color should start to fade almost instantly. Bleach out the color as best you can. Remove from the bucket of bleach and rinse with cold water. Let them dry for a few hours.
Now, you can absolutely leave these white, but I chose to dye mine for a little pop of color.

Fill your bucket with hot water and add the RIT dye. Stir until the powder has dissolved and then drop your trees in. The longer they soak, the more vibrant the color. So play around with it! Some I only dipped for a few minutes, and some I left for about an hour.
Remove from the dye and rinse with cold water! Allow 12-24 hours to dry and then get ready to decorate that cake I know you’ve been wanting to bake!


Place a small dollop of frosting on the bottom of each tree and place wherever you want on the cake! I let the icing on my cake dry/harden a little before adding the trees.


 Don’t just limit yourself to the trees. Reach for the
 stars wreaths.


I’m thinking about making an entire army of bottlebrush trees for our house. Logan would LOVE that.
Click here to see more holiday projects from our holiday series, Mission: Merry!
To see more DIY projects, click right here!
**disclaimer – I’m not claiming this to be 100% food safe. It’s cute and that’s why I did it. I allowed the icing on the cake extra time to dry and harden before adding the trees. If you’re really concerned, place the trees AROUND the cake, rather than on top. BUT STILL MAKE ‘EM. Because they’re the shiz.
photography: all photos by PROPER


So cute, Lexy! I can’t even handle it.
Thanks, B! We have pink trees all over the house now!
Very cute! Would probably put them all over my house!
Thanks for sharing!
Lauren
http://www.spacebyLV.com
Thanks, Lauren! Oh man, they really are everywhere. ON shelves, on the mantel, on our food! Everywhere!
This is the sweetest thing I’ve ever seen in my life …. I’m doing this!
Lauren! Thank you~! You absolutely should do these. I will honestly never buy a bottlebrush tree at a vintage or antique store again!
That’s so cute!!!! Amazing diy.
http://www.kinikunormal.blogspot.com/
Thank you, Marsya! I hope you make them!
Really pretty!!